


 E-LIQUID
 E-LIQUID
 E-LIQUID
 E-LIQUID
 E-LIQUID
 E-LIQUID
 LITTLE
 MEDIUM
 LARGE
LARGE FRENCH
 ENGLISH
 AMERICAN
 CANADIAN
 MALAYSIAN


 BASE
BASE
 BOOSTERS
 ADDITIVES
 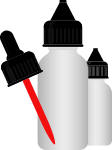 ACCESSORIES
 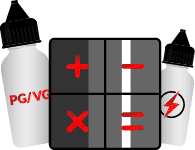 DIY CALCULATOR


 ACCUS & CHARGERS
 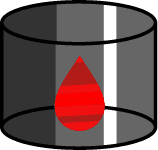 PYREX & TANKS
  DRIP TIPS
 BOXES & MODS
 RESISTANCES
  RESISTANCE WIRES
  COTTON
  TOOLS
TOOLS PETIT NUAGE
 MOYEN NUAGE
 GROS NUAGE


 BOXS & MODS
 MODS & BOXS
 E-PIPES
 RTA
RTA
 RDA
RDA
 RDTA
RDTA


 TOP COMPLETE KITS
  TOP BOXS & MODS ELECTRO
 TOP MODS & BOXS MECA
 SIMPLE

 ADVANCED
 EXPERT
 POD CARTRIDGES
  TOP
RECONSTRUCTIBLE ATOMIZERS
TOP
RECONSTRUCTIBLE ATOMIZERS  TOP DRIPPERS
 TOP E-LIQUIDES


 COMPLETE KITS
  BOXS & MODS
 RECONSTRUCTIBLE ATOMIZERS

 MATERIAL PROMOTIONS
  E-LIQUIDS PROMOTIONS
  DIY PROMOTIONS


How to prepare your own e-liquids?
3 anss ago / by / 2 mins read
For most of you, using e-liquids is simply a matter of buying ready to vape (RTV) liquids into which you simply - if the bottle is larger than 10ml of juice - add one or more nicotine boosters before consuming them.
But make no mistake, there is an alternative to this way of using them: DIY (meaning Do It Yourself). What does it involve? As the English terminology suggests, it's about making your own liquids from selected ingredients. The first advantage is financial. Indeed, for a derisory price in comparison with RRP, you can enjoy a product that meets your expectations. And the pleasure of concocting your own recipes is unrivalled.

But what do we need?
1. A Base
This is the fundamental component of your recipe and will serve as the liquid medium in which the mixture will be made. The base comes in several sizes (from 50ml to 5L) and will be composed of Vegetable Glycerin (VG) and Propylene Glycol (PG) in variable proportions, which influences the amount of steam and the throat hit.
The more PG there is, the more pronounced the throat hit and the more fluid the liquid will be. The higher the VG content, the greater the vapour production and the thicker the liquid. The most common PG/VG ratios are 50/50, 30/70, 20/80 and even 100% VG.
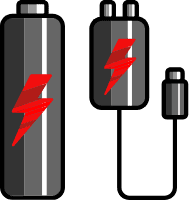
2. Nicotine boosters
Since the base is not nicotine-rich, you will need to add the number of boosters necessary to obtain the nicotine level you expect. Boosters are legally limited to 10 ml and 20 mg/ml of nicotine, and there are many online calculators that allow you to determine the precise doses to be respected.
3. From concentrates or flavours
Here, two options are available to you: the first is the primary flavours that you will have to assemble as you wish, carefully dosing each one to obtain the desired flavour. Combining flavours, such as vanilla and a sweet strawberry, for example, has never been easier.
Concentrates, on the other hand, already contain all the flavours that have been assembled by the manufacturer in the right quantities. All you have to do is dilute them in the base to obtain your liquid. The recommended dosage is always indicated on the bottle to obtain perfectly balanced flavours.
4. Syringes, pipettes, scales
For those who start blending flavours in a more sophisticated way, bottles and graduated syringes will be essential to cultivate the dosage with meticulousness. In addition, some will prefer to rely on weight rather than volume. In this case, a precise scale will allow the exact proportion of each flavour to be measured.
5. Patience
Once the blend has been made, a period of maturation - called a steep - is essential in order to give the flavours time to develop. This period can range from a few days to several weeks depending on the flavours used. But in the end, the pleasure of discovering your liquid after so much waiting is only multiplied by ten.


Leave a Reply Cancel Reply